Mecken Swyter
Passionate technologist and lifelong learner

Tech enthusiast and lifelong learner with expertise in Microsoft 365, cybersecurity, and cloud technologies.

View all authors

Azure Managed Identities

· 3 min read
Mecken Swyter
Passionate technologist and lifelong learner

Managed identities can be used to manage Azure resources without using hardcoded credentials - removing the need to enter credentials from a VM (or other resources such as Azure Functions) that are accessing resources the managed identity has been given access to. There are two types of managed identities - User Assigned and System Assigned. User assigned can be used by multiple resources and system assigned is tied to one specific VM (resource). User assigned is created as a Managed Identity that can be assigned to multiple VMs.

tip

System-assigned managed identities are ideal for scenarios where one resource is involved and the identity is not required long-term. For example, if the resource is deleted, the managed identity would follow the lifecycle of that resource and be deleted along with it. User-assigned managed identities are ideal for scenarios that involve managing multiple resources and in cases where the identity needs to outlive the resource(s).

Creating a System Assigned managed identity

  1. Navigate to Home > Virtual Machines > VM > Identity.
  2. Under the System assigned tab, toggle Status to On.
  1. Navigate to Home > Resource Groups > [ Resource group ] > Access control (IAM)
  2. + Add > Add role assignment
  3. Select a Role, select members (managed identity), Review + assign.
  4. Use RDP (Remote Desktop) to connect to the VM.
  5. Open PowerShell (Admin) and type the following command to automatically connect (without manually entering credentials) to the Azure resources the VM has access to via System managed identity with the following command: az login --identity
  6. Type az group list to verify access to the resource group.

Creating a User Assigned managed identity

  1. Navigate to Home > Managed Identities.
  2. Select + Create, fill out the necessary information.
  1. Select Review + Create > Create.
  2. Repeat the following steps for each VM that will be configured with User assigned managed identity.
    1. Navigate to Home > Virtual Machines > VM > Identity.
    2. Under the User assigned tab, select + Add. Select the previously created managed identity.
    1. Select Add.
  3. Navigate to Home > Resource Groups > [ Resource group ] > Access control (IAM).
  4. + Add > Add role assignment.
  5. Select a Role, select members (managed identity), Review + assign.
  6. Use RDP (Remote Desktop) to connect to the VM.
  7. Open PowerShell (Admin) and type the following command to automatically connect (without manually entering credentials) to the Azure resources the VM has access to via System managed identity with the following command: az login --identity.

Configure Azure PowerShell

· 2 min read
Mecken Swyter
Passionate technologist and lifelong learner

Using the Azure Portal to create and manage resources can be beneficial for one-off tasks and learning about different services offered in Azure; however, it becomes more practical to take advantage of a scripting language such as PowerShell for management of tasks as it allows the use of one-liner syntax, piping outputs, and scripting.

info

It is recommended to use PowerShell 7. If not already installed on the management machine, instuctions on installing the latest version of PowerShell 7 can be found here.

Install Azure PowerShell

Navigate to PowerShell, Run as an administrator, and install the Azure PowerShell module using the following command:

Install-Module az -Scope AllUsers -Force

Authenticate to Azure

Authenticate to an Azure tenant. This method will involve the Az PowerShell module opening a web browser window to authenticate with an account that has rights to a Azure subscription.

Connect-AzAccount

The following cmdlets can be useful to confirm the context of the tenant and subscription actively being managed as one account can be used to manage multiple tenants and Azure subscriptions.

Get-AzContext
Get-AzContext -ListAvailable
Get-AzSubscription

Find Azure commands

Here we will use the Get-Command cmdlet to retrieve available cmdlets that contain the Get verb, AzVM contained in the noun, and are apart of the Az.Compute module.

Get-Command -Verb Get -Noun AzVM* -Module Az.Compute
CommandType     Name                                               Version    Source
----------- ---- ------- ------
Alias Get-AzVmssDiskEncryptionStatus 7.1.1 Az.Compute
Alias Get-AzVmssVMDiskEncryptionStatus 7.1.1 Az.Compute
Cmdlet Get-AzVM 7.1.1 Az.Compute
Cmdlet Get-AzVMAccessExtension 7.1.1 Az.Compute
Cmdlet Get-AzVMADDomainExtension 7.1.1 Az.Compute
Cmdlet Get-AzVMAEMExtension 7.1.1 Az.Compute
Cmdlet Get-AzVMBootDiagnosticsData 7.1.1 Az.Compute
Cmdlet Get-AzVMChefExtension 7.1.1 Az.Compute
Cmdlet Get-AzVMCustomScriptExtension 7.1.1 Az.Compute
Cmdlet Get-AzVMDiagnosticsExtension 7.1.1 Az.Compute
Cmdlet Get-AzVMDiskEncryptionStatus 7.1.1 Az.Compute
Cmdlet Get-AzVMDscExtension 7.1.1 Az.Compute
Cmdlet Get-AzVMDscExtensionStatus 7.1.1 Az.Compute
Cmdlet Get-AzVMExtension 7.1.1 Az.Compute
Cmdlet Get-AzVMExtensionImage 7.1.1 Az.Compute
Cmdlet Get-AzVMExtensionImageType 7.1.1 Az.Compute
Cmdlet Get-AzVMImage 7.1.1 Az.Compute
Cmdlet Get-AzVMImageOffer 7.1.1 Az.Compute
Cmdlet Get-AzVMImagePublisher 7.1.1 Az.Compute
Cmdlet Get-AzVMImageSku 7.1.1 Az.Compute
Cmdlet Get-AzVMRunCommand 7.1.1 Az.Compute
Cmdlet Get-AzVMRunCommandDocument 7.1.1 Az.Compute
Cmdlet Get-AzVMSize 7.1.1 Az.Compute
Cmdlet Get-AzVMSqlServerExtension 7.1.1 Az.Compute
Cmdlet Get-AzVmss 7.1.1 Az.Compute
Cmdlet Get-AzVmssDiskEncryption 7.1.1 Az.Compute
Cmdlet Get-AzVmssRollingUpgrade 7.1.1 Az.Compute
Cmdlet Get-AzVmssSku 7.1.1 Az.Compute
Cmdlet Get-AzVmssVM 7.1.1 Az.Compute
Cmdlet Get-AzVmssVMDiskEncryption 7.1.1 Az.Compute
Cmdlet Get-AzVmssVMRunCommand 7.1.1 Az.Compute
Cmdlet Get-AzVMUsage 7.1.1 Az.Compute

Using Microsoft application proxy to enforce MFA on the Genetec web app

· 2 min read
Mecken Swyter
Passionate technologist and lifelong learner

If an on-premises web application does not support modern authentication, using Microsoft Entra application proxy can be a great way to add strong authentication (MFA) to the web app. This can provide multiple benefits: Firstly, when creating an Entra application proxy app, it is assigned a service principle in the Entra tenant and can therefore be targeted by conditional access polices to enforce strong authentication before access is granted. Secondly, Microsoft Entra application proxy allows access to internal web applications without the need for an VPN or opening up any ports on the firewall.

Genetec is a very robust and popular physical security software. Organizations use this platform to manage surveillance cameras and door access controls. Currently as of the date of writing this guide, Gentec supports adding third-party identity providers for authentication where strong authentication can be applied; however, there is not a supported way to turn off authentication with one of the local Genetec accounts or an account synced by Active Directory. In this article, we will attempt to mitigate this short coming by creating a Microsoft Entra application proxy app that will be used to access the Genetec web app and enforce strong authentication before the app proxy can be accessed.

Prerequisites

  • Entra ID P1 or P2
  • A Genetec subscription with at least the Professional level license.
  • A Windows member server with the Entra app proxy agent installed that has line-of-sight with the server hosting the web app.
  • Windows Server 2012 R2 or later

Entra ID Emergency Access Account

· 8 min read
Mecken Swyter
Passionate technologist and lifelong learner

To avoid losing administrative access to the Entra portal from things such as misconfiguring a conditional access policy (CAP), it's important to setup an emergency access (break glass) account with the Global Administrator role assigned to it. In this guide, we'll walkthrough the process of creating an emergency access account, setting up phishing resistant authentication, and setup monitoring to receive alerts when the account is used.

note

To follow along with this guide, you will need a FIDO2 security key with capacitive touch to implement phishing resistant authentication.

info

Emergency access account common best practices

Some of the common best practices when managing an emergency access account are as follows:

  • Avoid using the account for normal administrative tasks or associating it with an individual user. Nor should any of the account's authentication methods be tied to an individual user.
  • Exclude the account from all Conditional Access policies.
  • Avoid using an account that is synced from an on-premises Active directory instance. Create a cloud-only account using the *.onmicrosoft.com domain associated with the Entra ID tenant.
  • If using Privileged Identity Management (PIM), make sure the Global Administrator role is a permanent assignment and if using a password, make sure it is not set to expire.
  • Monitor sign-in and audit logs of this account.

Create a user with the Global Administrator role

tip

Be sure to use *.onmicrosoft.com for the User principal name and use a strong randomly generated password. Also, if using Privileged Identity Management (PIM), verify the Global Administrator role is a permanent assignment for this user.

  1. Navigate to entra.microsoft.com
  2. Select Users > All users > New user > Create new user
  3. Fill out all the required fields under the Basics tab and verify the Account enabled box is checked.
  4. Under the Properties tab fill out any applicable fields.
  5. Under the Assignments tab select Add role. Search for and select the Global Administrator role.
  6. Select the Review + create tab, then select the Create button.

Setup phishing-resistant authentication

In the past, it has been recommended by administrators to avoid using Multi-factor authentication (MFA) with the break glass account and to use only a very strong password; however, Microsoft is now requiring MFA to access the Azure portal (this inludes the Entra admin portal). To satisfy this requirement and avoid tying MFA to an individual user, we'll setup a FIDO2 security key as a means of strong authentication for the break glass account.

tip

Verify that Passkey (FIDO2) is enabled as an authentication method. This can be verified from the Entra admin center by navigating to Protection > Authentication methods > Polices > Passkey (FIDO2) and verifying the method is enabled for All users or Selected groups.

warning

It is recommended to setup two separate passkeys in the event that one of them becomes inaccessible. Repeat the steps below to setup a second YubiKey.

  1. Open a new InPrivate or Incognito browser window and navigate to https://aka.ms/mfasetup
  2. Sign in with the newly created break glass account. It's possible you will be prompted to setup MFA. If so, setup MFA with either the Microsoft Authenticator app or phone. Once the passkey (YubiKey) has been configured with this account, the Microsoft Authenticator or phone option can be removed as a sign-in method, as the YubiKey and PIN satisfy the strong authentication requirement.
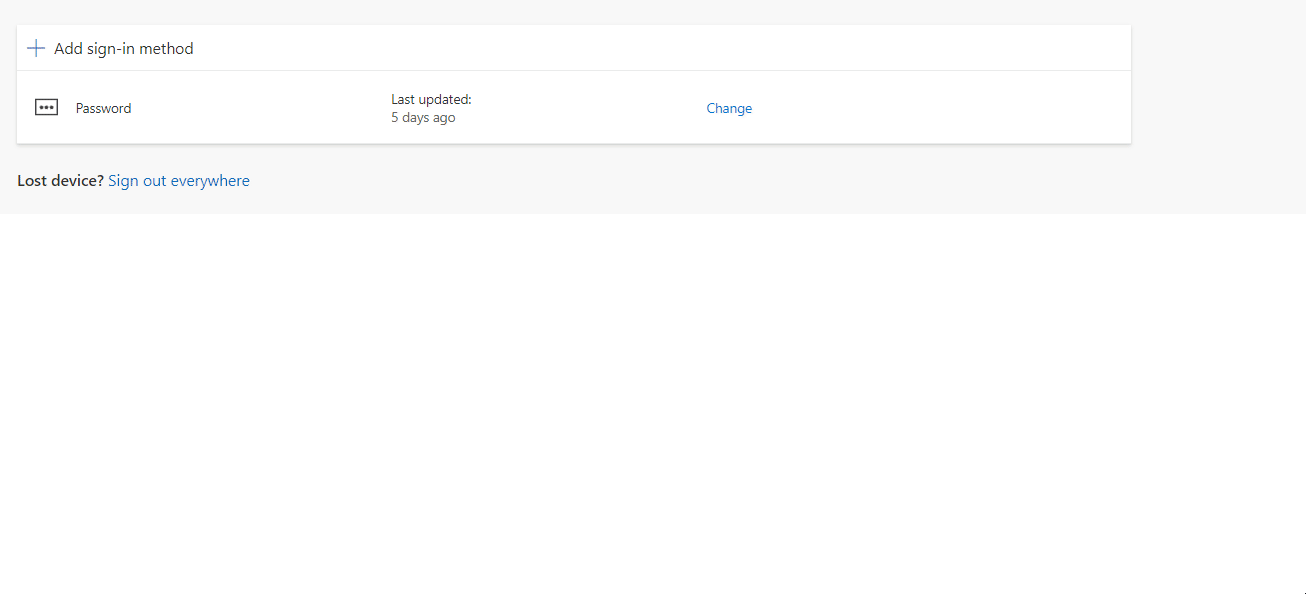
  3. From the Security tab, select Add a sign-in method. Under choose a method, select Security key.
  4. Follow the on-screen instructions to finish setting up the YubiKey. If a PIN has not already been setup for the YubiKey, you will be prompted to setup a PIN and prompted to touch the YubiKey to finalize the setup.
  5. Now store the YubiKey and PIN in a safe place.

Setup monitoring and alerting for sign-in logs

note

An Azure subscription is required to complete this section of the guide; as well as at least a Microsoft Entra ID P1 or P2 tenant.

Since the emergency access account is a highly privileged role, it's important to configure monitoring and alerting of all sign-in events generated by this account. We'll walkthrough setting this this up using an Azure Log analytics Workspace.

Create a Log Analytics Workspace

  1. Navigate to portal.azure.com
  2. In the top search bar of the Azure portal, search for and select Log Analytics workspaces.
  3. Select + Create, fill out all of the necessary fields (if an appropriate resource group has not already been created, a new one can be created in this step) and select Review + Create.

Configure Entra ID Diagnostic Settings

tip

Allow up to 15 minutes after configuring the Diagnostic Settings for the Log Analytics workspace to start collecting sign-in logs.

  1. Navigate to entra.microsoft.com
  2. From the Microsoft Entra admin center, navigate to Identity > Monitoring & Health > Diagnostic settings.
  3. Under General, select + Add diagnostic setting.
  4. Create a Diagnostic setting name.
    1. Under Logs > Categories, select the checkbox for AuditLogs.
    2. Under Destination details, select the checkbox for Send to Log Analytics workspace.
    3. Select the appropriate Azure subscription and the Log Analytics workspace created in the previous steps and select Save.

After 15 minutes, use the Break Glass account (or any other account in the tenant) and sign in to a Microsoft service to generate some sign-in events. Then from the Entra admin center, navigate to Identity > Monitoring & Health > Log Analytics to confirm sign-in logs have been generated.

tip

If no sign-in events are being displayed, try adjusting the Time range filter. Additionally, try switching from Simple mode to KQL mode and run the following query:

search *

Create an alert to notify Administrators when the Break Glass account is used to sign-in

note

To obtain the Object ID to use in the KQL query used for the alert, from the Entra admin center, navigate to Identity > Users > All users, and select the Emergency Access (Break glass) user and copy the Object ID of the user for use in the KQL query.

  1. Navigate to portal.azure.com

  2. In the top search bar of the Azure portal, search for and select Log Analytics workspaces.

  3. Select the Log Analytics workspace associated with the Entra ID Diagnostic Settings sign-in logs.

  4. Navigate to Monitoring > Alerts.

  5. Select + Create > Alert rule.

  6. Under Condition > Signal name, select Custom log search.

  7. Insert the following KQL into the query editor (makes sure to replace the Object ID with the actual Object ID of the Break glass account):

    // Search for a single Object ID (UserID)
    SigninLogs
    | project UserId
    | where UserId == "00aa00aa-bb11-cc22-dd33-44ee44ee44ee"

    If monitoring multiple Break glass accounts, use a query similar to the one below.

    // Search for a single Object ID (UserID)
    SigninLogs
    | project UserId
    | where UserId == "00aa00aa-bb11-cc22-dd33-44ee44ee44ee" or UserId == "11bb11bb-cc22-dd33-ee44-55ff55ff55ff"
  8. Select the Run button and then the Continue Editing Alert button.

  9. Under the Condition tab, update the Alert logic > Threshold value to 0.

    note

    If increasing the Frequency of evaluation to reduce the monthly cost of the alert, the frequency should be less than or equal to the alert evaluation period. Since the Evaluation period is based on aggregated points, update the Aggregation granularity to be greater than or equal to Frequency of evaluation.

  10. Under the Actions tab, select Use action groups. If there is already an appropriate action group available, select the checkbox next to the action group and the Select button. If a new action group is needed, select + Create action group, fill out the appropriate information under the Basics and Notifications tabs (Select Email/SMS message/Push/Voice for Notification type).

  11. Under the Details tab, update the Alert rules details > Severity field to 0 - Critical.

  12. Select Review + create > Create.

To verify everything is working as expected, sign in to entra.microsoft.com using the Emergency access (Break glass) account to generate some sign-in logs to activate the alert. If everything is working as expected, alerts should start being received via the notification methods defined in the action group associated with the alert. Additionally, navigating to Monitoring > Alerts from the Log Analytics workspace should display a list of recently fired alerts.

If alerts are being received, everything has been configured correctly.

Configuring a Cisco Network Switch

· 2 min read
Mecken Swyter
Passionate technologist and lifelong learner

This is a basic guide on configuring a Cisco network switch using the CLI (Command-line interface). Most of the examples provided in this guide will be performed using Cisco Packet Tracer.

Initial switch configuration

When first connecting to the switch, we start in user EXEC mode. This is a very limited mode. Enter the enable command to elevate to Privileged EXEC mode.

Switch>enable
Switch#

Now that we are in Privileged EXEC mode, we need to elevate to Global Configuration mode to configure the switch.

Switch#configure terminal 
Enter configuration commands, one per line. End with CNTL/Z.
Switch(config)#
tip

When a command is entered incorrectly, Cisco IOS will get hung up attempting to resolve the mistyped command to an IP address and require Ctrl +Shift+ 6 to break out of it. The following command will prevent this behavior.

Switch(config)#no ip domain-lookup

A Cisco switch comes with a default name of Switch, the default name can be changed by running the following command. Notice how the start of the command prompt now starts with S1.

Switch(config)#hostname S1
S1(config)#

Console Password: Add a password to the console session.

S1(config)#line console 0
S1(config-line)#password cisco
S1(config-line)#login

Privilege EXEC Password: Add a password to privilege EXEC mode.

S1(config)#enable secret cisco
info

Show Running Config: Verify passwords were configured correctly by stepping back down to Privileged EXEC and run:

S1#show running-config

⚠️ Create a MOTD Banner: Warn against unauthorized access using a MOTD (Message of the Day) banner.

S1(config)#banner motd "Authorized access only. Violators will be prosecuted to the full extent of the law."

Configure an IP on an Interface: Add an IP address to the default Vlan 1 interface.

S1(config)#interface vlan 1
S1(config-if)#ip address 192.168.1.253 255.255.255.0
S1(config-if)#no shutdown

S1(config-if)#
%LINK-5-CHANGED: Interface Vlan1, changed state to up

%LINEPROTO-5-UPDOWN: Line protocol on Interface Vlan1, changed state to up
info

Verify IP addressing by running show ip interface brief

S1#show ip interface brief


FastEthernet0/22 unassigned YES manual down down
FastEthernet0/23 unassigned YES manual down down
FastEthernet0/24 unassigned YES manual down down
GigabitEthernet0/1 unassigned YES manual down down
GigabitEthernet0/2 unassigned YES manual down down
Vlan1 192.168.1.253 YES manual up up